Table of Contents
Introduction
Cooking chicken that is tender, juicy, and bursting with flavor is a goal for chefs and home cooks alike. Yet, achieving consistently moist chicken can feel like a challenge. How often have you sliced into what you thought was a perfectly cooked bird, only to find it dry and underwhelming?
This article unveils the secrets to achieving succulent chicken every time, regardless of the cooking method. By understanding the science behind chicken’s moisture content, mastering preparation techniques like brining, and following foolproof cooking methods, you’ll elevate your chicken dishes from ordinary to extraordinary.
Whether you’re roasting a whole chicken, grilling wings, or sautéing breasts, these tips and tricks will help you retain moisture and lock in flavor, ensuring a delicious result every time. Let’s begin by exploring the science of moisture in chicken.
Understanding the Secret to Moist Chicken
Moisture retention in chicken starts with a deeper understanding of its natural composition. Chicken meat primarily consists of muscle fibers, proteins, water, and a small amount of fat. When exposed to heat, the proteins in chicken denature, causing water to be released. This is why chicken can become dry and rubbery if overcooked or improperly handled.
Why Does Chicken Dry Out During Cooking?
The two biggest contributors to dry chicken are heat and time. Here’s a closer look:
- Overcooking: High temperatures force water out of the muscle fibers faster than they can retain it, leaving the chicken dry.
- Cooking for Too Long: Even low temperatures can gradually lead to moisture loss if the chicken remains exposed for an extended period.
- Improper Preparation: Without proper moisture-locking steps, like brining, chicken lacks the water it needs to stay juicy during cooking.
Understanding Chicken Cuts and Fat Content
Different cuts of chicken contain varying amounts of fat and water, which affects how they cook:
- Breasts: Lean and prone to drying out because they have less natural fat.
- Thighs and Drumsticks: These cuts have higher fat content, which acts as a natural buffer against moisture loss.
- Wings: Small but often fattier, making them more forgiving.
The Science of Water Retention
Water plays a key role in keeping chicken juicy. When chicken is heated:
- The proteins tighten and shrink, squeezing out moisture.
- Cooking methods that are too aggressive (e.g., frying on high heat without preparation) exacerbate water loss.
This is why techniques like brining, marinating, and choosing the right cooking methods are essential to retaining moisture.
Brining: A Key Step in the Secret to Moist Chicken
If there’s one technique that stands out as a game-changer for juicy chicken, it’s brining. Brining involves using a salt-based solution to enhance the chicken’s natural moisture content, locking in flavor and tenderness. This step can transform even the leanest chicken breast into a succulent masterpiece.
What is Brining?
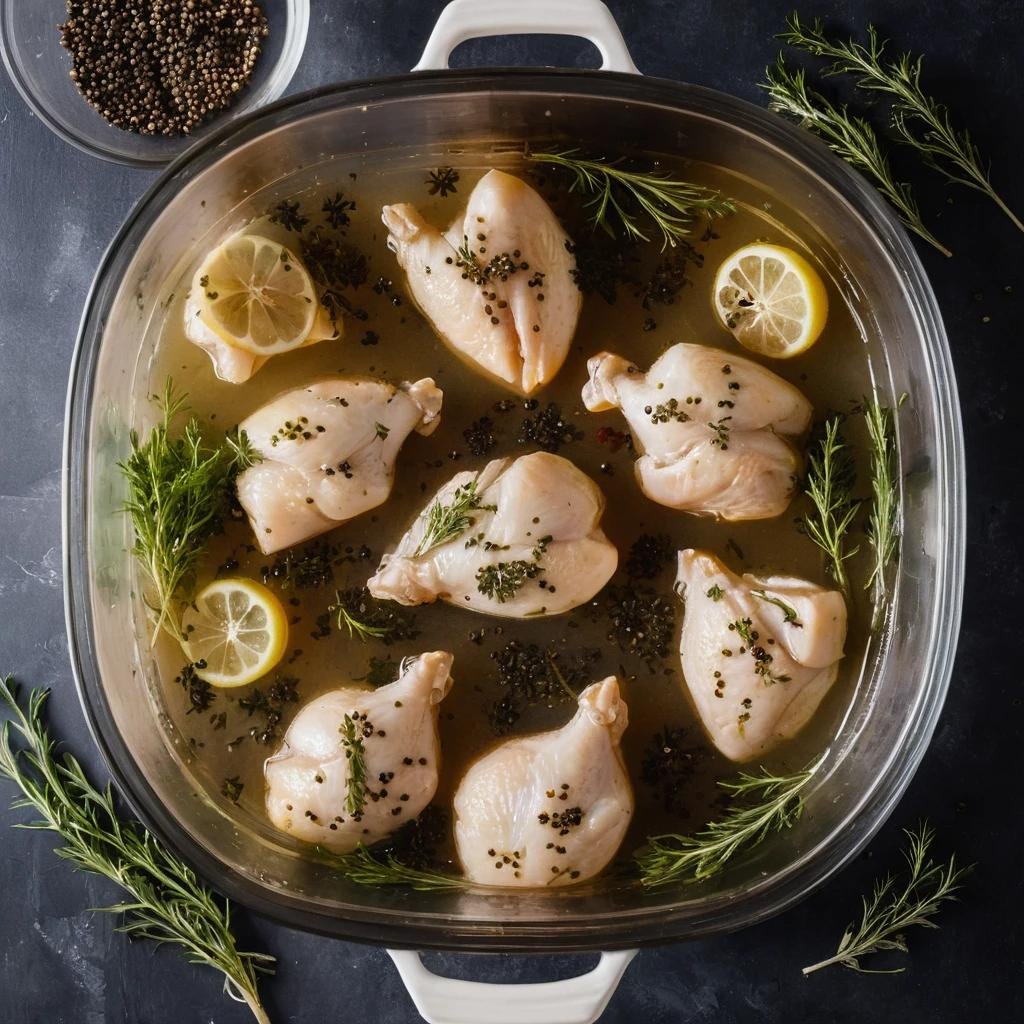
Brining is the process of soaking or coating chicken with a salt solution to alter its muscle structure. The salt breaks down proteins in the meat, allowing it to absorb and retain more liquid. This process improves both the texture and flavor of the chicken, ensuring it stays juicy during cooking.
Types of Brining
There are two main types of brining: wet brining and dry brining. Each has unique advantages depending on the dish you’re preparing.
- Wet Brine
- A wet brine is a liquid solution made with water, salt, and sometimes sugar or aromatics like garlic, herbs, or spices.
- Chicken is submerged in this mixture for a specific amount of time, allowing it to absorb the liquid.
- Wet brines are ideal for whole chickens or large cuts, as they provide even moisture throughout.
- Dry Brine
- A dry brine uses salt and optional seasonings rubbed directly onto the chicken.
- This method draws out the meat’s natural juices initially, which then reabsorb, creating a concentrated flavor.
- Dry brines work best for cuts where crisp skin is desirable, like roasted chicken thighs or whole roasted chicken.
How Long to Brine Chicken
The length of time for brining depends on the size and cut of the chicken:
- Whole Chicken: 8–12 hours in a wet brine, or 6–8 hours with a dry brine.
- Chicken Breasts: 30 minutes to 2 hours.
- Chicken Wings: 1–4 hours.
- Thighs or Drumsticks: 1–6 hours, depending on thickness.
It’s important not to over-brine, as this can make the chicken too salty and change its texture.
Pro Tips for Successful Brining
To get the most out of your brining process:
- Use a large, food-safe container or resealable bag for even brine coverage.
- Keep the chicken refrigerated during the brining process to prevent bacterial growth.
- Rinse the chicken thoroughly after wet brining to remove excess salt, then pat it dry with paper towels before cooking.
Flavor Boosts with Brine
While salt is the primary ingredient in a brine, you can elevate its flavor with additional ingredients:
- Sweetness: Add sugar, honey, or maple syrup for a sweet-savory balance.
- Aromatics: Include garlic, onions, or ginger for depth.
- Herbs and Spices: Rosemary, thyme, or black pepper can add layers of flavor.
- Citrus Zest or Juice: Lemon, lime, or orange can brighten the chicken’s flavor profile.
By brining, you’re giving the chicken a head start on moisture retention, which means it will stay juicy no matter the cooking method.
Cooking Techniques: Unlocking the Secret to Moist Chicken
Even with the best preparation, the cooking method you choose can make or break your efforts to retain moisture in chicken. Each technique has its own benefits, and knowing how to adapt your approach based on the cut and desired outcome is crucial.
Roasting Chicken to Perfection
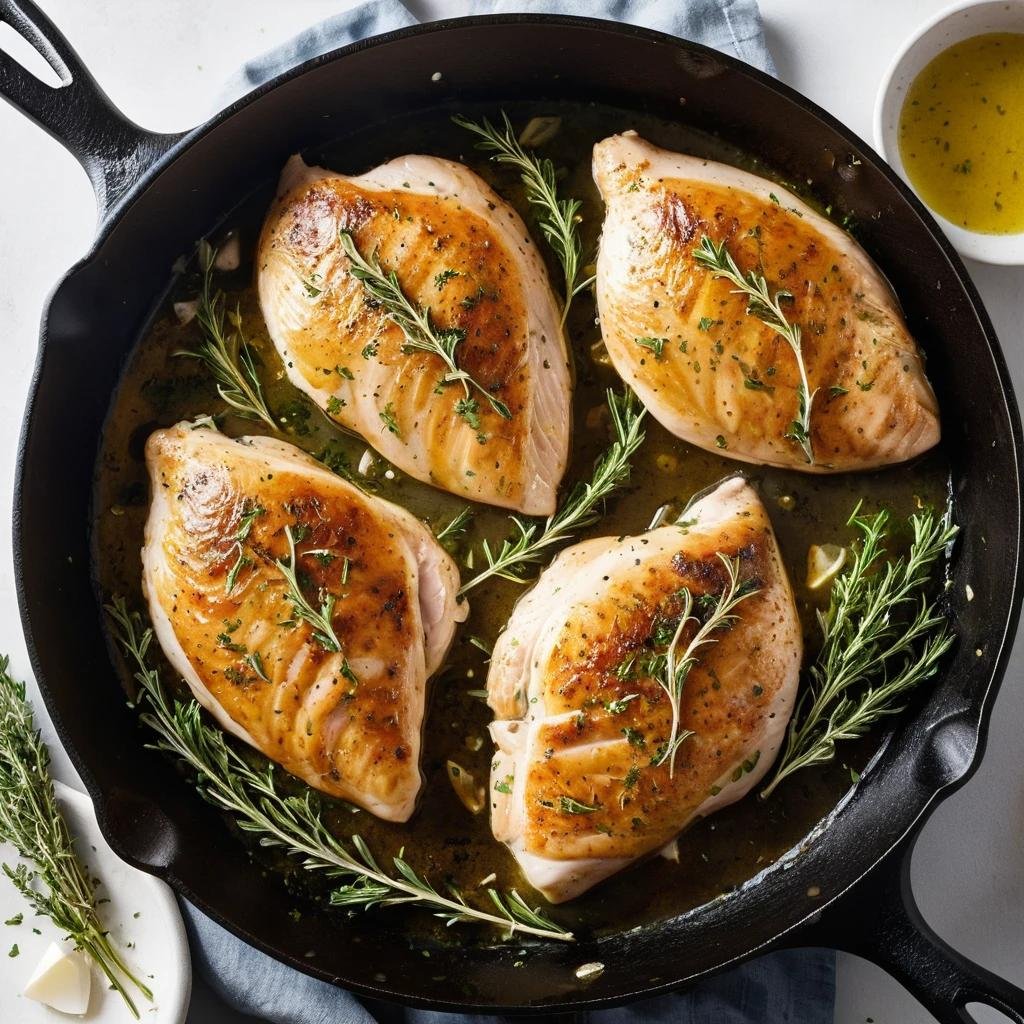
Roasting is one of the most popular ways to prepare chicken, especially for a whole bird or bone-in cuts. However, achieving moist chicken while ensuring crispy skin requires precision.
Tips for Moist Chicken When Roasting:
- Use a Meat Thermometer: The internal temperature should reach 165°F (74°C) for breasts and 175°F (80°C) for thighs. Avoid overcooking by removing the chicken as soon as it reaches these temperatures.
- Butter Under the Skin: Spread butter or oil under the skin before roasting to keep the meat juicy and the skin golden and crisp.
- Basting: Periodically spoon pan drippings, melted butter, or stock over the chicken to maintain moisture.
- Cook at the Right Temperature: Start roasting at a high temperature (425°F or 220°C) for the first 15–20 minutes, then lower it to 375°F (190°C) to finish cooking evenly.
Grilling Chicken Without Drying It Out
Grilled chicken is beloved for its smoky flavor, but it can dry out quickly if not done properly. Here’s how to grill juicy chicken every time:
Key Techniques for Grilling:
- Marinate for Moisture: Marinades with oil, acidic components (like lemon juice), and seasonings infuse the chicken with flavor and help retain moisture.
- Control the Heat: Use indirect heat for thicker cuts. Place the chicken away from the direct flame to cook it evenly without burning.
- Timing is Everything: Thin cuts like wings or tenders cook quickly and should be removed from the grill as soon as they’re done to avoid overcooking.
- Let It Rest Before Serving: Resting grilled chicken allows juices to redistribute, preventing them from escaping when sliced.
Poaching: A Foolproof Method
Poaching is one of the gentlest cooking methods, perfect for preserving the natural moisture of chicken. It involves simmering chicken in liquid, such as water, broth, or milk, at a low temperature.
How to Poach Chicken:
- Place the chicken in a pot and cover it with cold liquid.
- Add aromatics like bay leaves, garlic, or herbs for added flavor.
- Heat the liquid until it reaches a gentle simmer (not a boil).
- Cook until the internal temperature reaches 165°F (74°C).
Poached chicken is especially great for recipes that call for shredded chicken, like salads, soups, or tacos.
Sautéing and Pan-Searing
For quick, juicy chicken with a golden crust, sautéing or pan-searing is an excellent choice. These methods work best for boneless cuts like chicken breasts or thighs.
Tips for Success:
- Preheat the pan: Ensure the pan is hot before adding oil and chicken to create a crisp outer layer that locks in moisture.
- Use moderate heat: Cooking over medium heat prevents the chicken from drying out before it’s fully cooked.
- Finish in the oven: For thick cuts, start by searing in the pan, then transfer the chicken to the oven to cook through evenly.
Tools to Elevate Your Cooking
The right tools can help you cook chicken to perfection:
- Meat Thermometer: An essential tool to avoid overcooking.
- Cast-Iron Skillet: Retains even heat, ideal for pan-searing or roasting.
- Basting Brush: Helps apply marinades, oils, or butter evenly.
- Grill Pan: Perfect for achieving grill marks indoors while controlling heat.
By choosing the right cooking technique for your chicken dish, you can ensure a moist, flavorful result every time.
Resting: The Hidden Secret to Juicy Chicken
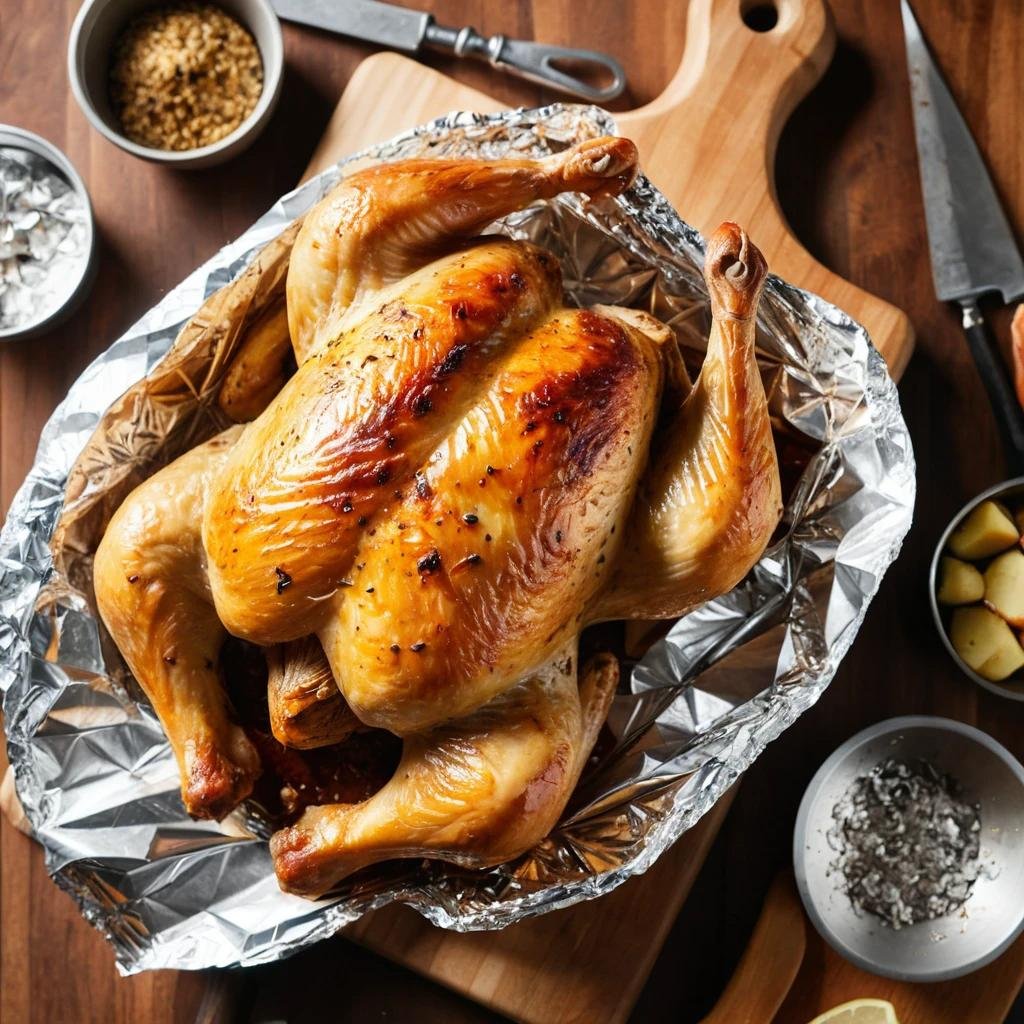
One of the most overlooked steps in cooking chicken is letting it rest after removing it from the heat. Resting plays a crucial role in ensuring that your chicken stays juicy and flavorful, preventing the dreaded dry texture that can ruin a dish.
Why Resting is Essential
When chicken is cooked, its internal juices are pushed toward the surface due to the heat. If you cut into it immediately after cooking, those juices escape, leaving the meat drier. Allowing the chicken to rest gives the juices time to redistribute evenly throughout the meat, locking in moisture.
How Long Should Chicken Rest?
The amount of resting time depends on the size and cut of the chicken:
- Chicken Breasts: 5–10 minutes.
- Thighs or Drumsticks: 5–10 minutes.
- Whole Chicken: 15–20 minutes.
Larger cuts, like whole roasted chickens, require more time to allow the juices to settle fully.
Resting Techniques for Best Results
To maximize the benefits of resting, follow these tips:
- Use a Tent of Foil: Cover the chicken loosely with aluminum foil to keep it warm without trapping steam, which can make the skin soggy.
- Place on a Rack: For whole chicken or roasted cuts, rest the meat on a rack to allow air circulation, preventing it from sitting in its juices.
- Avoid Over-Resting: Resting too long can cool the chicken and affect texture. Serve promptly after the recommended resting period.
How to Slice Chicken After Resting
Cutting chicken the right way ensures even slices and preserves the juices:
- For breasts, slice against the grain (perpendicular to the muscle fibers) to make each bite tender.
- For thighs and drumsticks, separate the meat at the joints for clean portions.
The Science of Resting
The redistribution of juices isn’t just a culinary trick; it’s a scientifically backed process:
- Heat and Pressure: During cooking, heat creates internal pressure, causing juices to move outward.
- Cooling and Reabsorption: As the chicken rests and cools slightly, the proteins relax, allowing the juices to be reabsorbed into the meat.
By incorporating a proper resting period into your chicken-cooking routine, you’ll ensure a consistently moist and flavorful dish that’s as enjoyable to eat as it is to prepare.
FAQs About Moist Chicken
Why Does My Chicken Turn Out Dry Even When I Follow Recipes?
Even when following recipes, a few key factors can lead to dry chicken:
- Overcooking: Many recipes provide approximate cooking times, but chicken can cook faster or slower depending on the oven or stovetop. Always use a meat thermometer to check for doneness.
- Inconsistent Oven Temperatures: Ovens can sometimes run hotter or cooler than the set temperature. Use an oven thermometer to ensure accuracy.
- Skipping Resting: Cutting into the chicken immediately after cooking allows juices to escape, making the meat dry.
Should I Cover Chicken with Foil While Baking?
Covering chicken with foil during baking is a common technique to retain moisture, but it depends on the desired outcome:
- For Moist Meat: Cover the chicken during the first half of baking to trap steam and prevent drying.
- For Crispy Skin: Remove the foil for the last 10–15 minutes of baking to allow the skin to brown and crisp.
Can I Save Chicken That’s Already Dry?
While you can’t fully restore lost moisture, there are a few ways to improve the texture of dry chicken:
- Use a Sauce or Gravy: Serve the chicken with a flavorful sauce to add moisture.
- Shred and Repurpose: Turn the dry chicken into a new dish, such as chicken salad or soup, where the added ingredients can compensate for the dryness.
- Reheat Gently: If reheating leftovers, add a splash of broth or water and cover the chicken to trap steam.
What’s the Best Way to Reheat Chicken Without Drying It Out?
Reheating chicken can often result in dryness, but the following methods help preserve moisture:
- Oven: Place chicken in a baking dish with a small amount of broth or water. Cover with foil and heat at 300°F (150°C) until warmed through.
- Stovetop: Heat in a covered skillet over low heat with a splash of water or broth.
- Microwave: Add a damp paper towel over the chicken to create steam and prevent it from drying out. Use low heat for even warming.
Does the Cut of Chicken Affect Moisture?
Yes, the cut of chicken significantly impacts how moist it remains during cooking:
- Breasts: Lean and more prone to drying out due to low fat content.
- Thighs and Drumsticks: Higher fat content makes these cuts juicier and more forgiving.
- Wings: While small, they have enough fat and skin to retain moisture during high-heat cooking.
How Does Marinade Help Keep Chicken Moist?
Marinades often contain acidic ingredients (like lemon juice or yogurt) and oil, which help tenderize the meat and lock in moisture:
- Oil: Creates a barrier to protect the meat during cooking.
- Acid: Breaks down tough muscle fibers, making the meat tender.
- Flavoring Agents: Herbs, spices, and aromatics penetrate the meat for enhanced taste.
By addressing these common concerns and following the tips provided, you’ll be well-equipped to tackle any challenges in cooking moist chicken.
Conclusion
Cooking moist chicken is an art that combines science, preparation, and technique. By understanding the reasons chicken tends to dry out and addressing them through steps like brining, using proper cooking methods, and resting, you can consistently achieve juicy and flavorful results.
Each stage of the process, from selecting the right cut of chicken to letting it rest after cooking, plays a pivotal role in retaining moisture. Whether you’re grilling, roasting, poaching, or pan-searing, the strategies outlined in this article ensure success.
To recap:
- Preparation is key. is a foundational step in the secret to moist chicken as it adds both moisture and flavor.
- Choose the right cooking method. Adapt your approach based on the cut and desired result, always keeping an eye on temperature and timing.
- Don’t skip the resting period. Letting chicken rest allows juices to redistribute, ensuring every bite is tender and moist.
With these techniques, you’ll never have to worry about dry chicken again. Instead, you’ll serve meals that impress family and friends with their succulence and flavor. Master these secrets, and every chicken dish you prepare will be a masterpiece.
Now that you’ve learned the secret to Moist Chicken, you might be interested in how to season it.

